Build Plugins with Coding Agents
You do not need to write code. Pick an AI coding agent, copy one message to it, and the AI does the rest — you only click Allow and buttons in the app.
What you can build: for example, a plugin where the catgirl reminds you to drink water, a tool she can call in chat, or a small panel showing today's tasks — if you can describe it in one sentence, you can build it.
1. Pick a route
2. Choose your agent
OpenAI Codex
- How to open the folder
- Open the Codex desktop app, sign in, and choose the empty folder you just created as the workspace.
- Let the AI take actions
- Click Allow whenever Codex asks to run something.
- Good to know
- The empty folder has no AGENTS.md yet. Once the AI creates the plugin, the message below tells it to read the AGENTS.md in the plugin folder — nothing extra for you to do.
3. Follow the steps
Open an empty folder in your agent (anywhere — a dedicated folder for this project; see the official tutorials in your agent's card in section 2 for how).
Send it this message:
Copy this message and send it to the AIPick a route, paste the message into your agent’s chat box and send.Click Allow whenever the AI asks to run something. It downloads and installs everything itself — be patient, this takes a while.
Open the URL it gives you. The first time, fill in a model API (if you don't have an API key yet, you can pick "Free Version" as the page's top tip says):
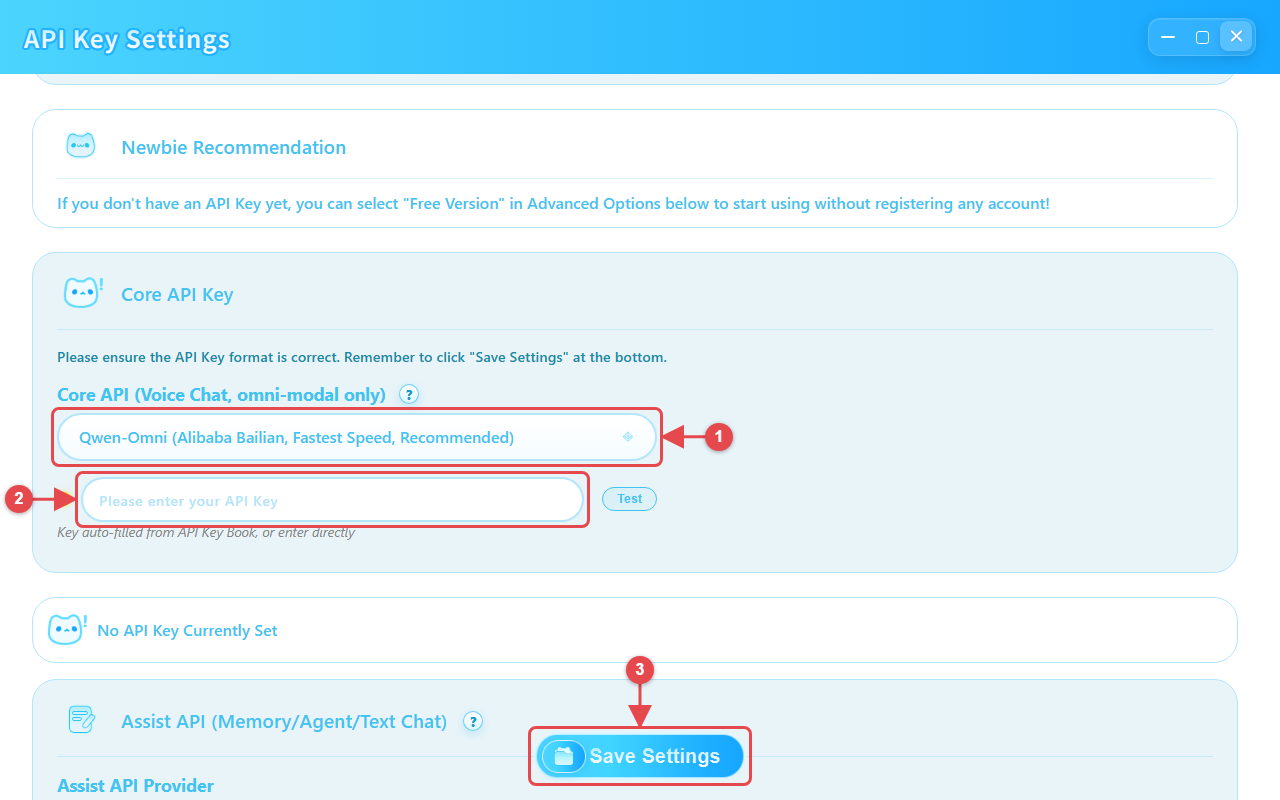
- Pick a Voice Model Provider.
- Enter your API key.
- Click "Save Settings".
Open Plugin Manager (see How to open Plugin Manager).
In the plugin list, click your plugin:
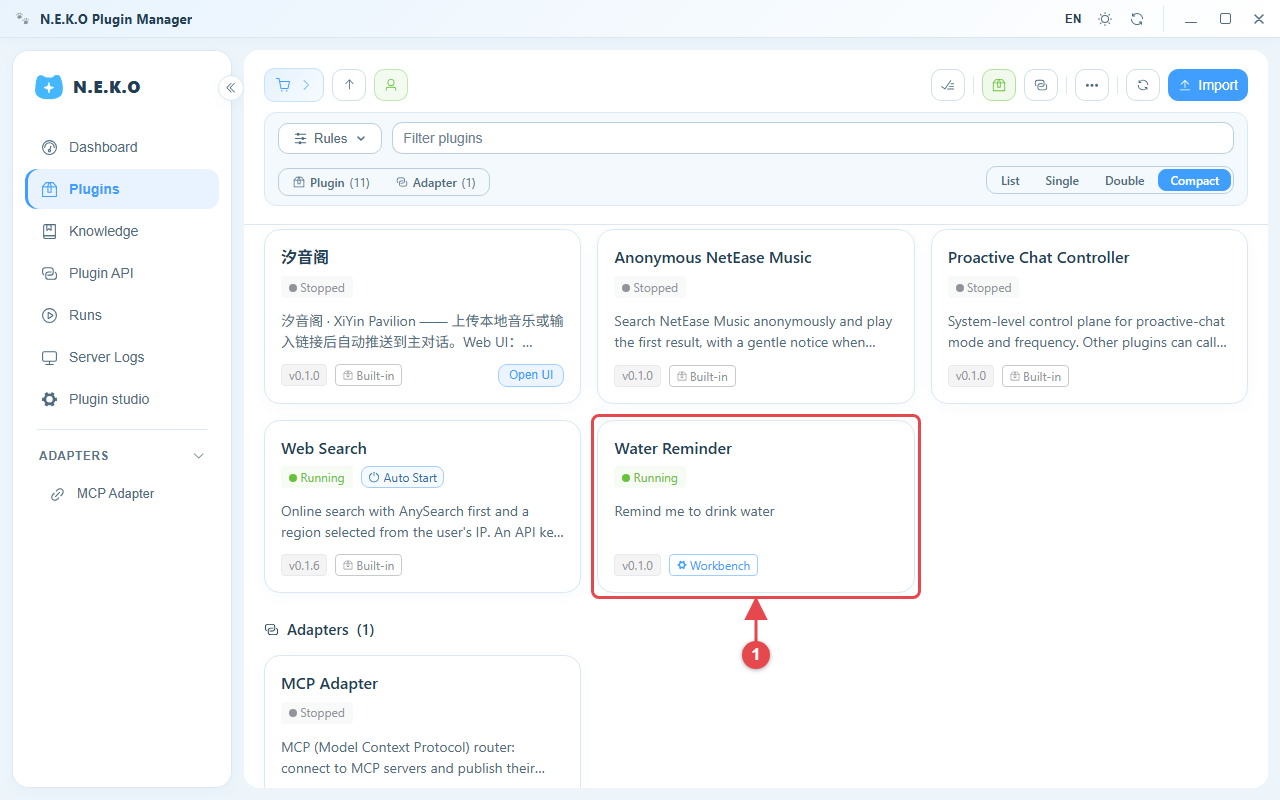
- Click your plugin card to open its detail page.
Click "Start" to try it:
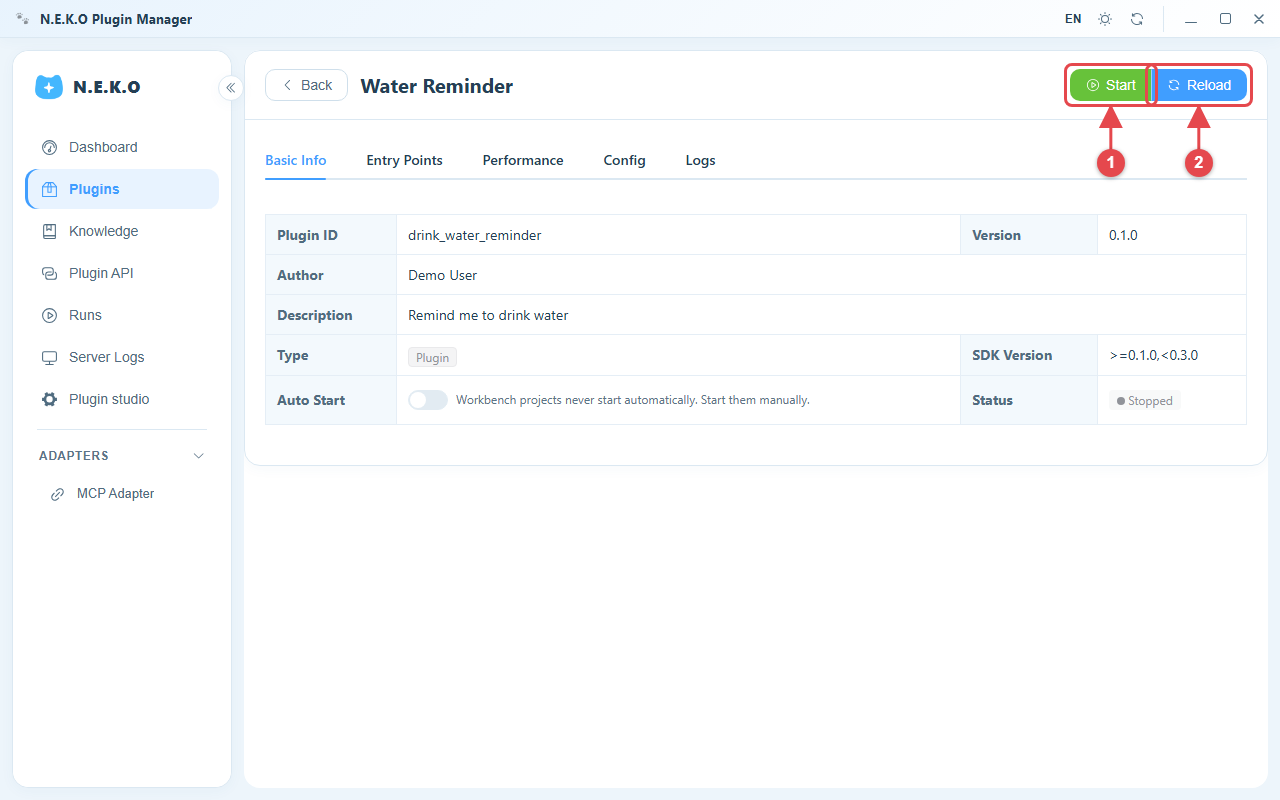
- Click "Start" to run the plugin.
- Changes reload automatically; click "Reload" here only if a change didn't take effect.
After that, just tell the AI what you want changed; next time, say "start N.E.K.O for me".
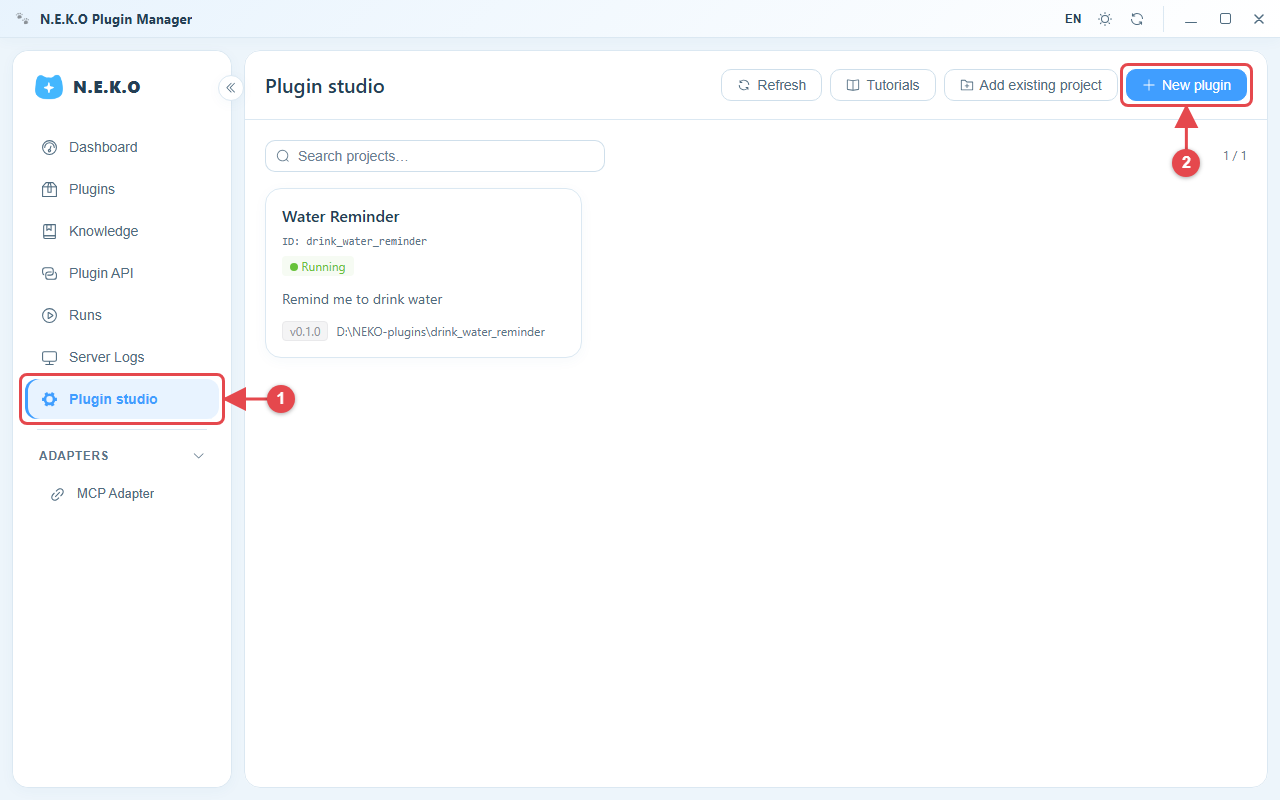
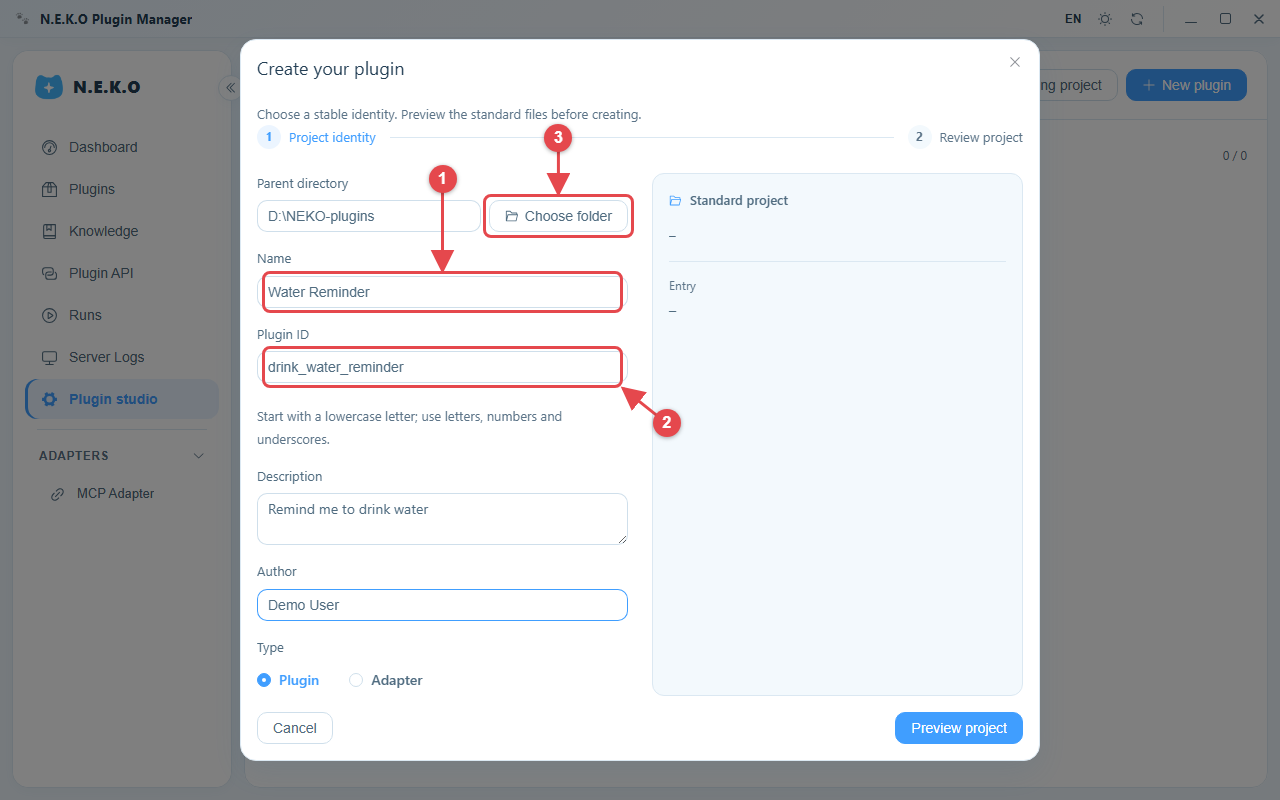
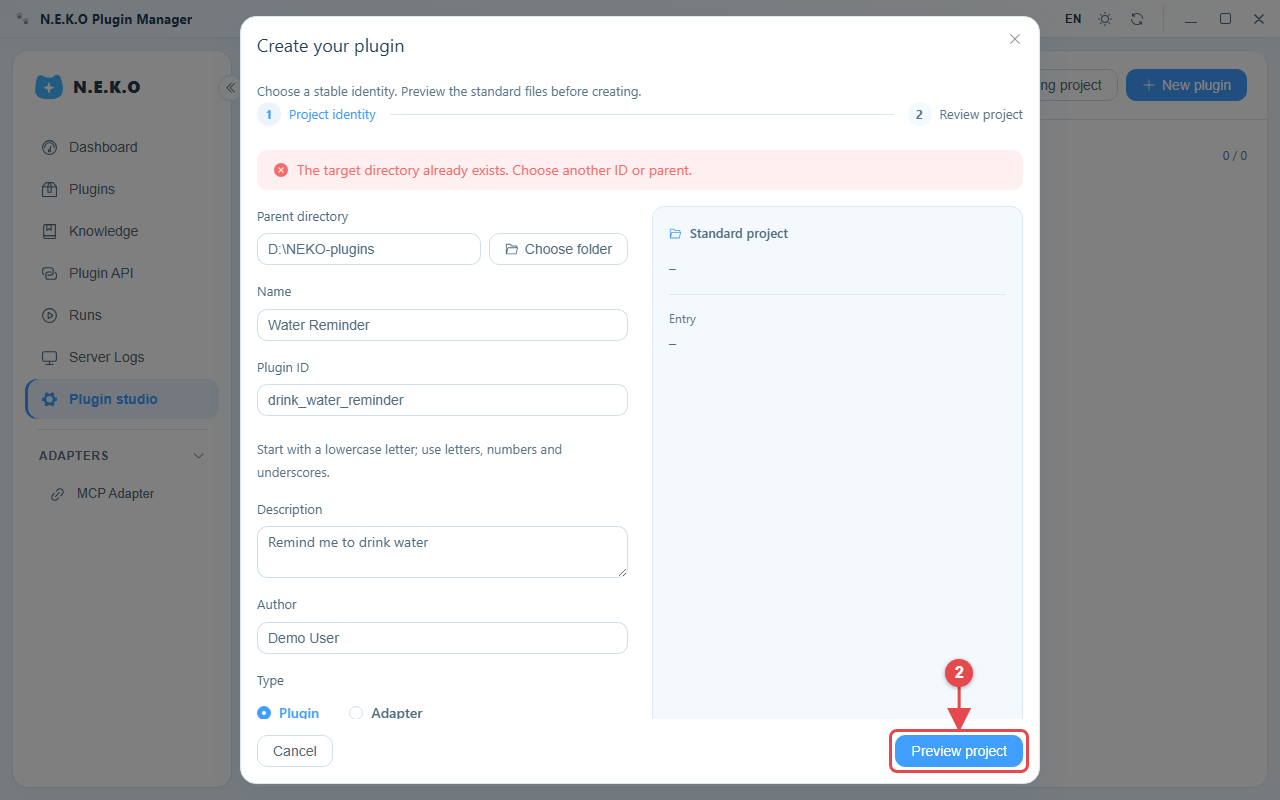
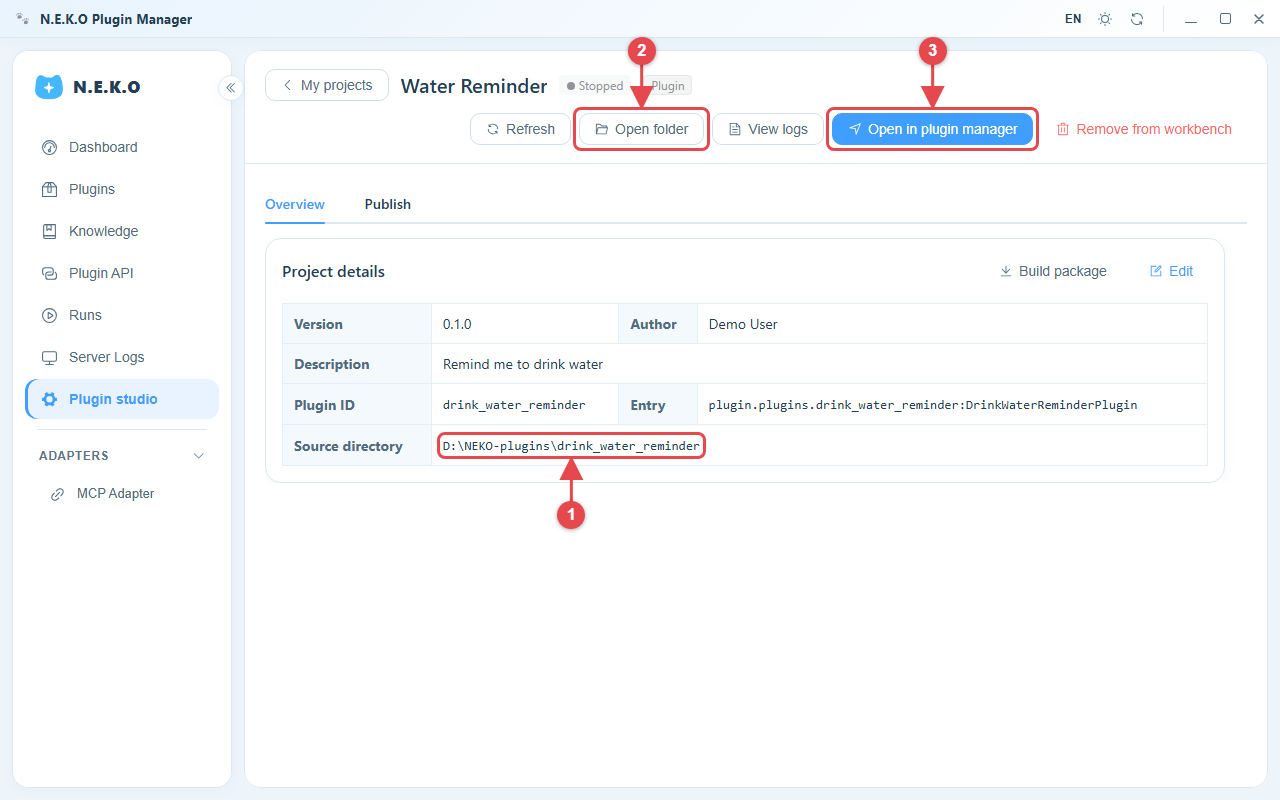
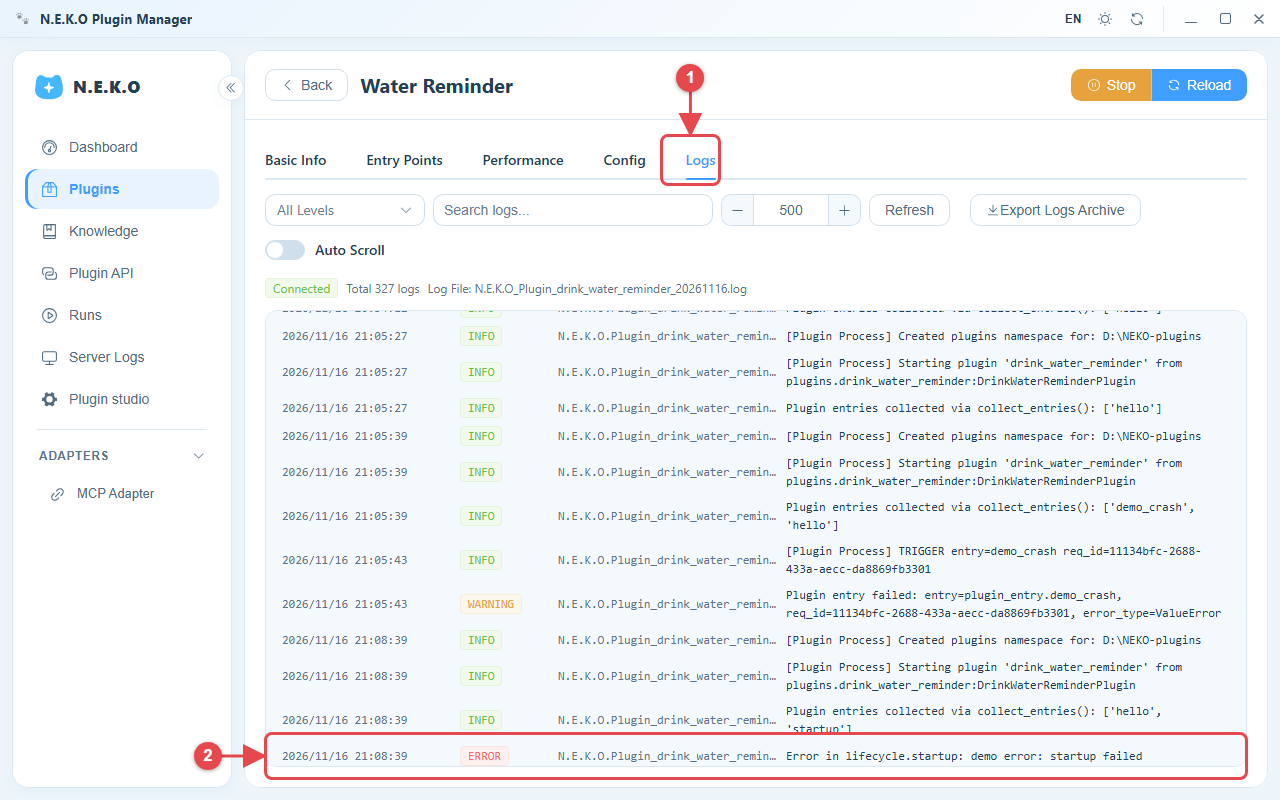
How to open Plugin Manager
Both routes use the plugin manager. Open it from the N.E.K.O main window:
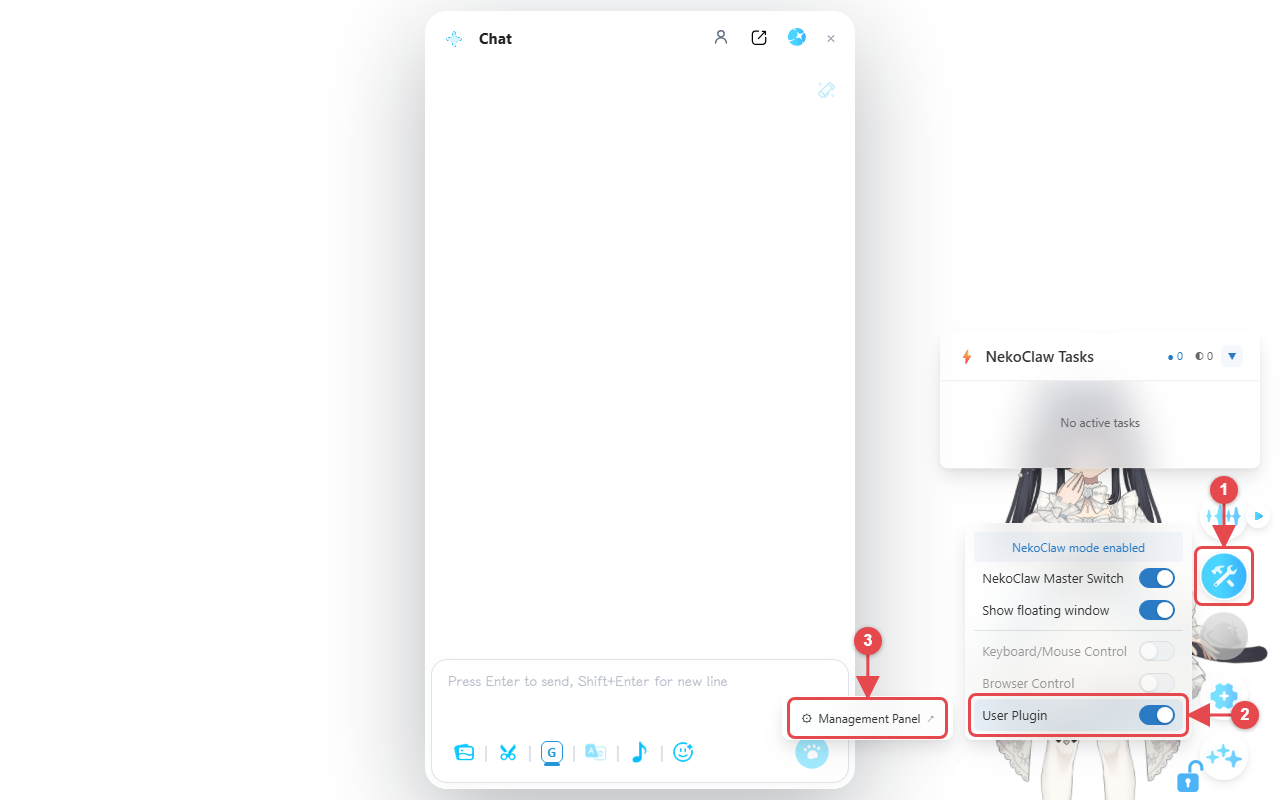
- Hover over the catgirl and click the round paw button that appears.
- In the popup, turn on "NekoPower"; plugins are switched on with it. If NekoPower was already on and "User Plugin" had been switched off by itself, turn "User Plugin" on.
- Hover over the "User Plugin" row and click the "Management Panel" button that appears — Plugin Manager opens in a new window.
4. Share it with others
Route B: on your project page in the studio, click "Build package":
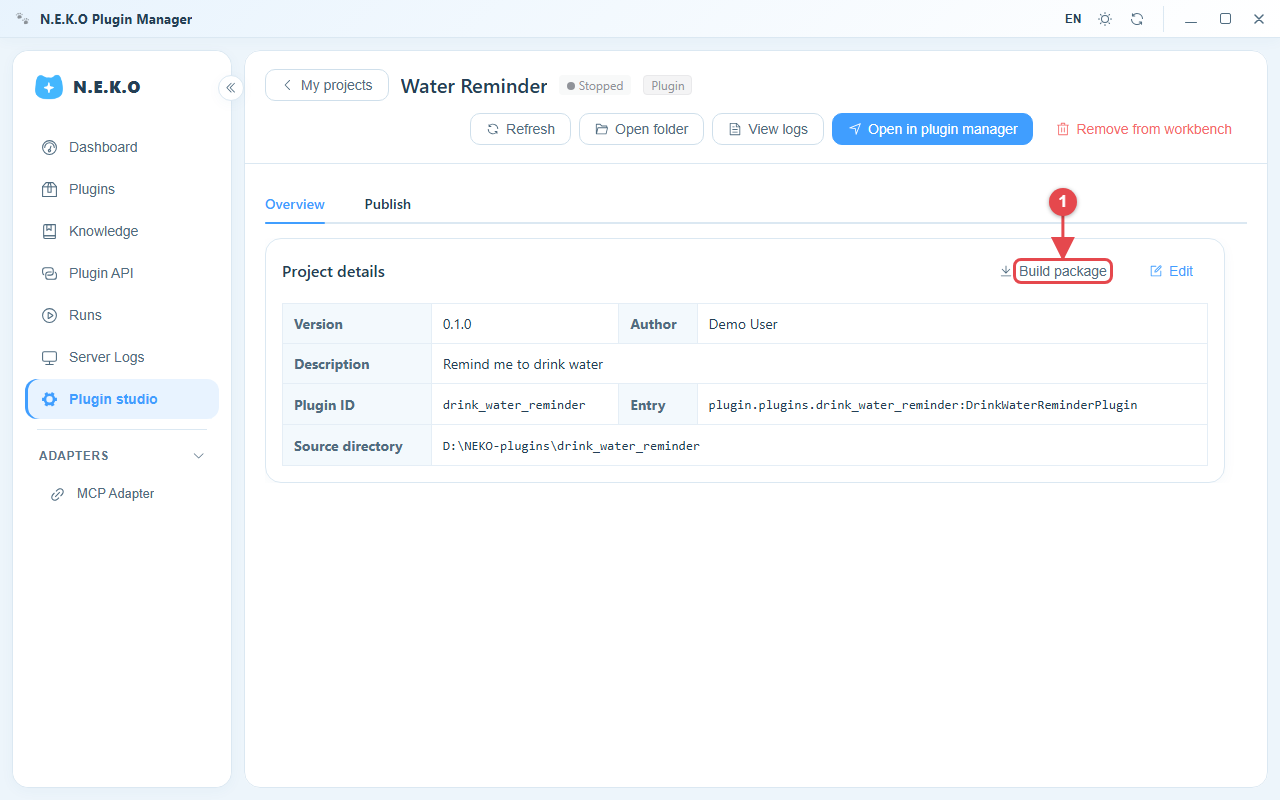
- Click "Build package" to get a
.neko-pluginfile.
Route A: just ask the AI to package it.
A friend who gets the .neko-plugin file clicks "Import" in Plugin Manager and drops it in:
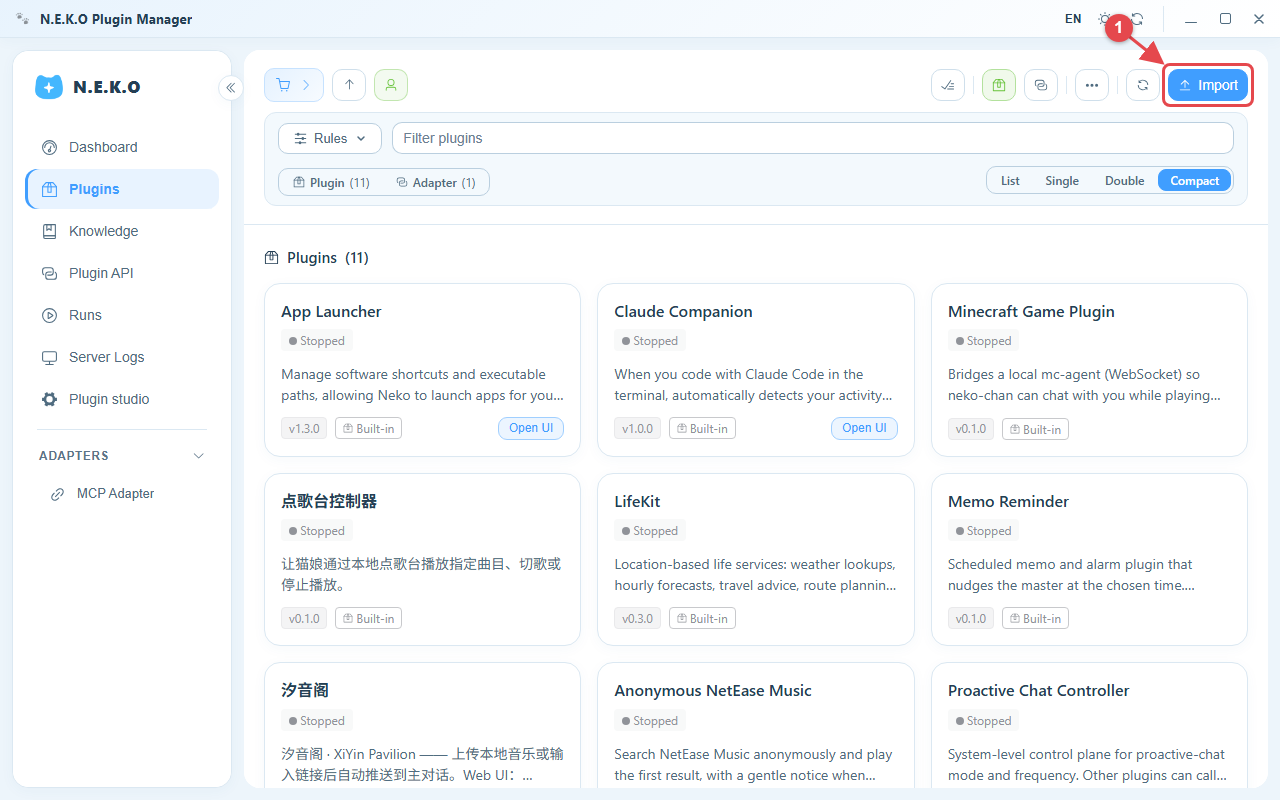
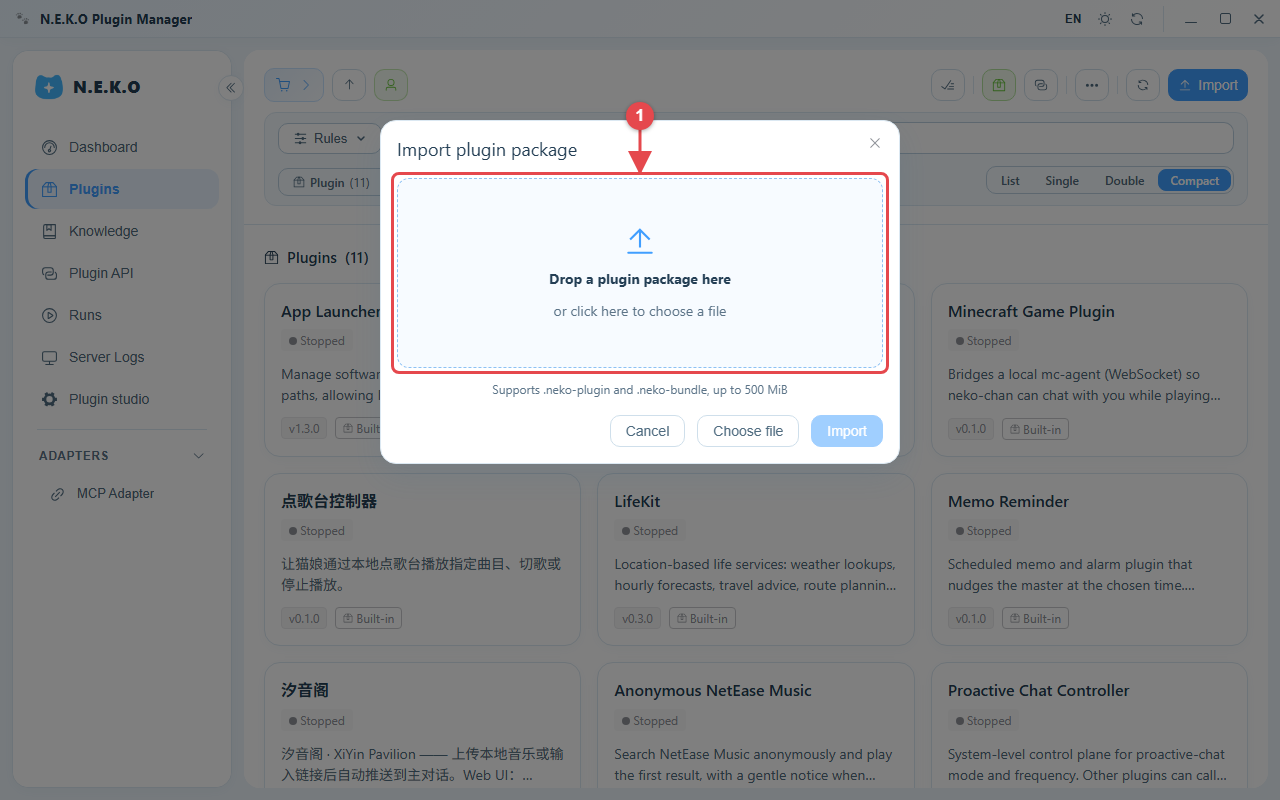
- Click "Import" on the Plugins page.
- Drop the
.neko-pluginfile into the box, or click to choose it.
Publishing to the Market works on both routes and needs a GitHub account: let the AI upload the project to GitHub and release a version; the first review submission is a few clicks on the Market upload page. See Publish a Plugin for the full flow. On Route B, the studio’s one-click publish isn’t available in the Steam / desktop build, so just hand it to the AI.
If the new project has no AGENTS.md, your N.E.K.O version is too old — update to the latest version and try again.
Running a source checkout or prefer to build manually? Read Getting Started with Plugin Development or the Quick Start.